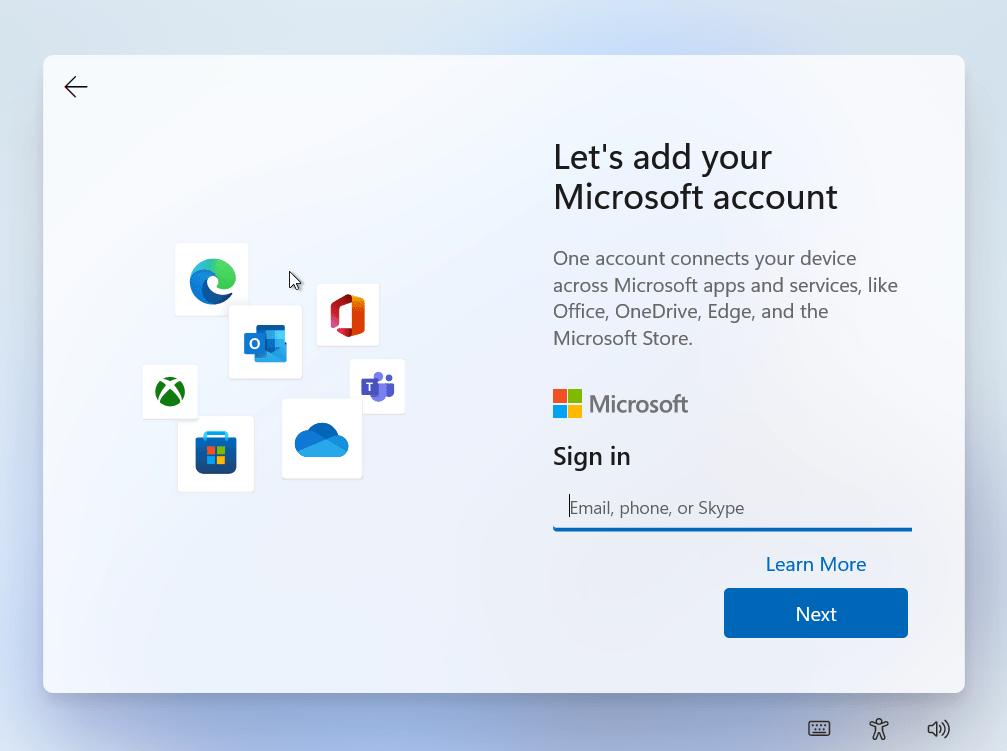
Many times, when you purchase a new computer, or just want to install Windows 10/11 Home in a computer/VM, you’ll probably have seen that you can’t skip the ‘connect to Microsoft account’ page, as the minimum requirements say:

But there’s an easy way to skip it without needing to buy Windows 10/11 Pro. And it’s what I’m going to explain in the following lines.
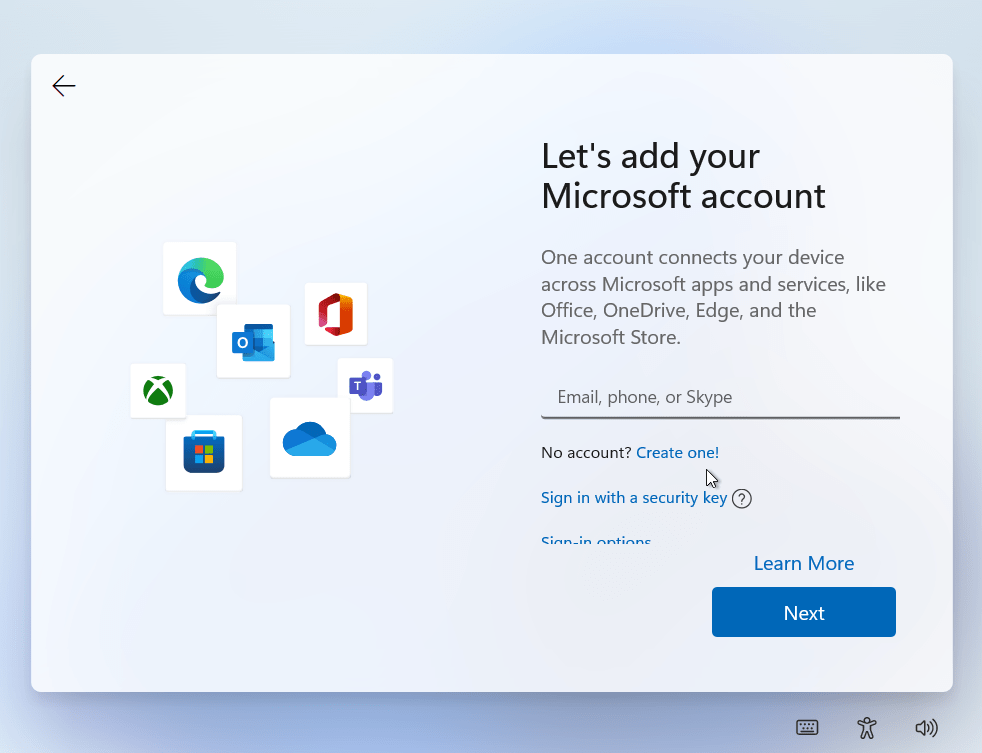
First of all, you need to be on the ‘connect to Microsoft account’ page:
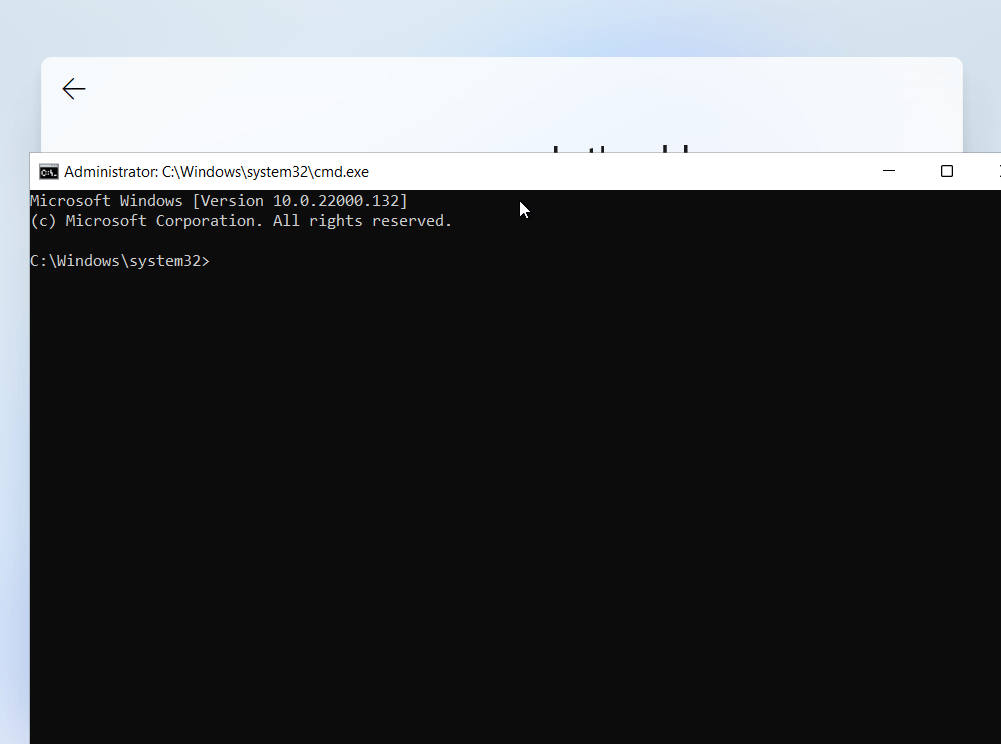
Now, press Shift+F10 and a command prompt window should open:
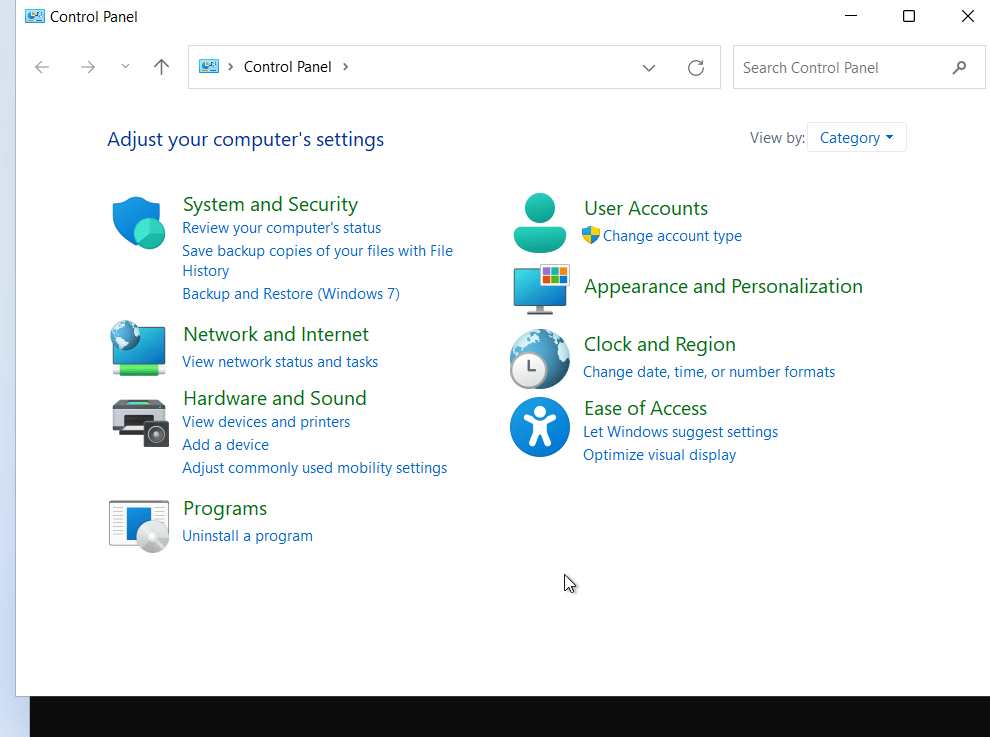
Now write control and press [Enter]. The control panel should open:
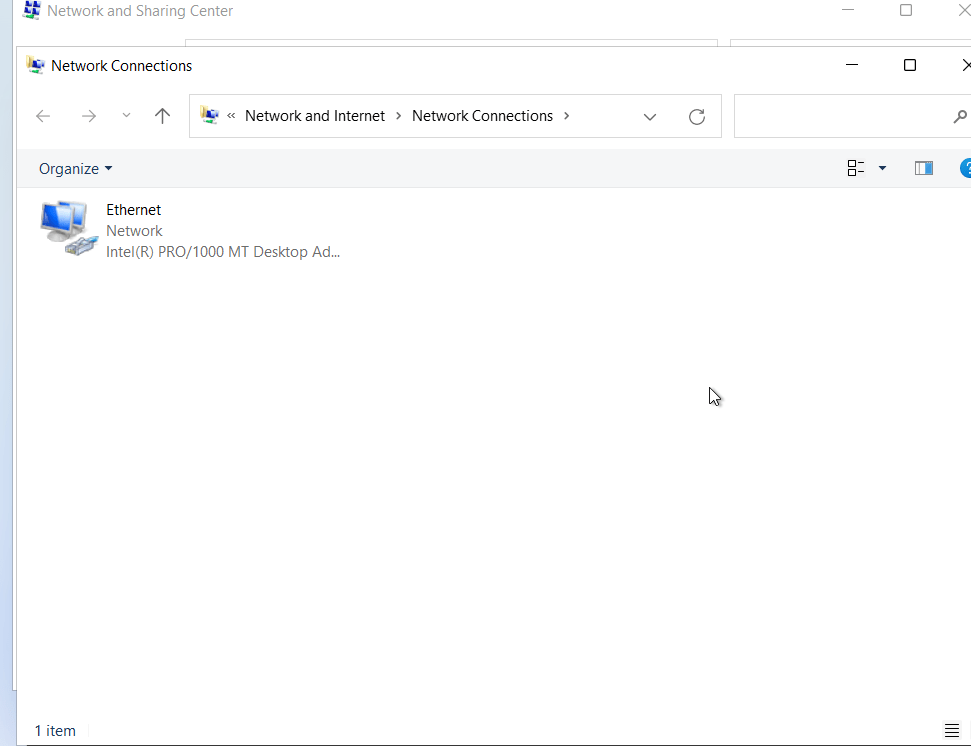
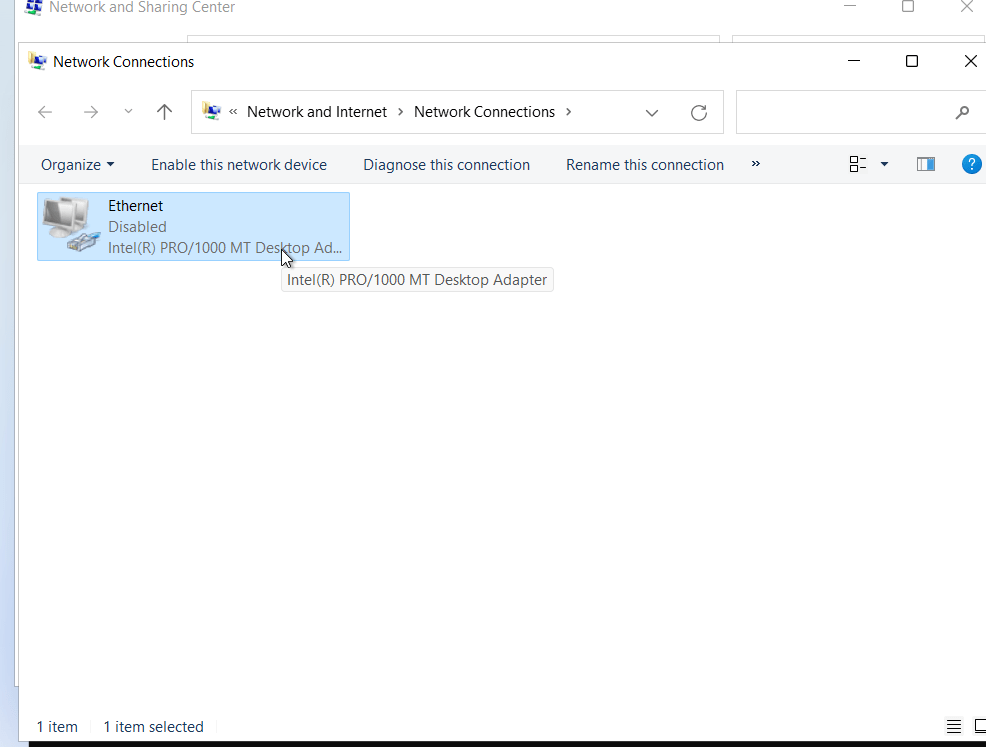
After that, go to ‘View network status and tasks’ under ‘Network and Internet’ and then, click on ‘Change adapter settings on the left panel. You should see a window similar to the following one:
Now, right click on the adapter that is currently in use (usually Ethernet or Wi-Fi) and click on ‘Disable’. The adapter should now gray out:
Now, you can close the command prompt and the main control panel window, but not the ‘Network connections’ one. After that, click on the OOBE. The ‘Network connections’ windows sould hide. Then, click on create account:
In the next screen, you should be prompted to create a local account. But before, Press Alt+Tab and re-enable the Network adapter. Now you may close that window, too.
And that’s all! I hope that this tutorial was useful. If you liked it, please share it with others if you liked it by clicking on the buttons below. Thanks!